Technical knowledage about extrusion mold
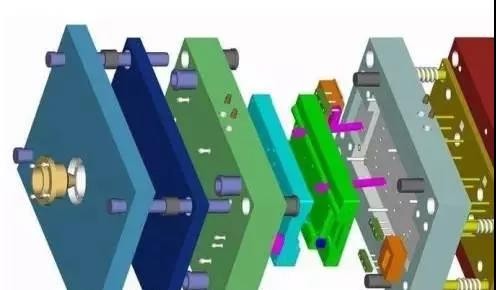
Extrusion mold is one kind of shaping mould, but his way of discharging is achieved by extruding action. It is widely used in aluminum type structures and is also used in plastic parts. At the front end of the extruder, it is used as a pipe, or a type. In short, molds are tools used to shape items. This tool consists of various parts. Different molds consist of different parts. It mainly realizes the shape of the item by changing the physical state of the molded material.
Processing Mould can be divided into metal mould and non-metal mould according to the material formed

Metal molds are further divided into:
Casting mould(non-ferrous metal casting, iron and steel casting), and forging mold;
Non-metal molds are also divided into:
Plastic molds and inorganic non-metallic molds.
According to the different materials of the mold itself, the mold can be divided into:
Sand molds, metal molds, vacuum molds, paraffin molds, etc..
Among them, with the rapid development of polymer plastics, plastic molds are closely related to people's lives.
Plastic molds can generally be divided into:
Injection molds, extruded molds, gas assisted molds, etc..
Field of application
Large-scale production of non-sheet metal steel-cold heading, die forging, metal die, etc..
Sheet metal material-hot, cold, hot, cold
Sheet metal processing-deep, rising, bending, punching, falling material
Non-ferrous metals-die-casting, powder metallurgy
Plastic-Injection, blowing(plastic bottle), extruding(pipe)
Other categories of molds:
Alloy mold
Sheet metal mold
Plastic molds
Stamping die
Casting mould
Extruding die
Die casting mould
Other molds
Extrusion mold Installation:
Mold head installation:
(1) After the test, confirm the qualified die head, first install the 12, if there is a transition package(piece 15), you need to be equipped with a transition sleeve, and connect the piece 12 with the piece 14 through a bolt; Before the two are finally tightened, the horizontal level of the mold head is adjusted with a level instrument(note that in the school level, avoid the use of iron and other heavy blows on the outside of the mold plate, so as not to cause damage to the positioning system and lead to a decrease in positioning accuracy). Screw fastening should be carried out step by step in order to ensure that the fastening force is uniform and reasonable.
(2) Select a suitable heating plate(ring) according to the shape size of the die head, and use screws to tighten it with the die head based on the thermocouple hole position to ensure that the heating plate(ring) is in close contact with the die head.
(3) Insert thermocouple and adjust the probe to adhere to the measurement surface and connect the power plug of the heating plate(ring)(note that the voltage of the two should match). The heating of the die head shall be carried out in segments. Generally, the temperature of each section shall be set to 140 °C, and the temperature to be raised to 140 °C shall be kept warm for 30 to 40 minutes, and then the temperature shall rise to the temperature at normal production.
(4) After the temperature of the die head has risen to the predetermined value, it is necessary to tighten the bolts on the firmware 16, 17 and flange again. The bolt can be turned on only after ensuring the fastening is reliable to prevent overflow.
Calibrators and water tank installation:
(1) After lifting the stereotypes to the stereotypes platform(note that the handle is operated on the operating surface), the vertical axis of the stereotypes is adjusted by the side-by-side method to be consistent with the corresponding center line of the stereotypes platform. The bottom plate(piece 1) on the molding die is then tightened with the molding table through the T-screw on the molding table.
(2) The connection of the water tank with the setting table is the same as the setting model; The water tank is positioned with a positioning column(piece 3) and connected with the M10X120 bolt and M10 nut through the bottom plate. Adjust the M10 nut to ensure that the inlet plate seal strip of the water tank is consistent with the corresponding end surface of the mold.
(3) Attach the air joint and the water inlet joint respectively according to the schematic diagram of the stereotyped die structure. The general principle of setting water and air joints is that the front end of each section of the mold is generally an inlet joint(the gasket is blue), the middle is an air joint(the gasket is black), and the end is a water outlet joint(the gasket is red). If the number of water joints in the machine tool is not enough, the water pipes used for entering and leaving the intermediate die may be considered.
(4) According to the diagram of the water tank structure, the water intake joint, the air joint and the cents 50 pumping(gas) pipe are connected.
(5) The first section of the mold shall use a specific vacuum pump, and the rest may be connected to a vacuum pump.
Extrusion mold testing:
Operators must be familiar with the extruder they operate
To correctly grasp the characteristics of the screw, heating and cooling control, instrument characteristics, tooling control mold structure and assembly conditions, in order to correctly grasp the extrusion process conditions, the correct operation of the machine.
The general operating steps for debugging are as follows:
(1) Before starting the machine, it should check whether the temperature control is sensitive, whether the instrument is malfunctioning, and whether the cooling waterway is smooth. Thermometers, cooling water and other methods are usually used for testing.
(2) The screw, barrel and die head of the extruder are heated according to the operating rules of the extruder. After the temperature rises to the set temperature, it must be kept warm for about 10 minutes before it can be turned on, so that the temperature of all parts of the machine tends to be stable.
(3) Make sure to screw and bolt all parts of the die before starting. Before the material is extruded, the operator must not stand directly in front of the mold to prevent the bolt or screw from breaking and causing injury.
(4) At the beginning of extruding, the screw speed should be used slowly, and then gradually accelerated to prevent overload and damage to the machine parts.
(5) When starting the machine, add a small amount of material first, and maintain the material balance. When adding the material, pay close attention to the torque and other table values. After the material is squeezed out of the die die and brought to the traction equipment, it can gradually increase the amount of material. Until normal extrusion.

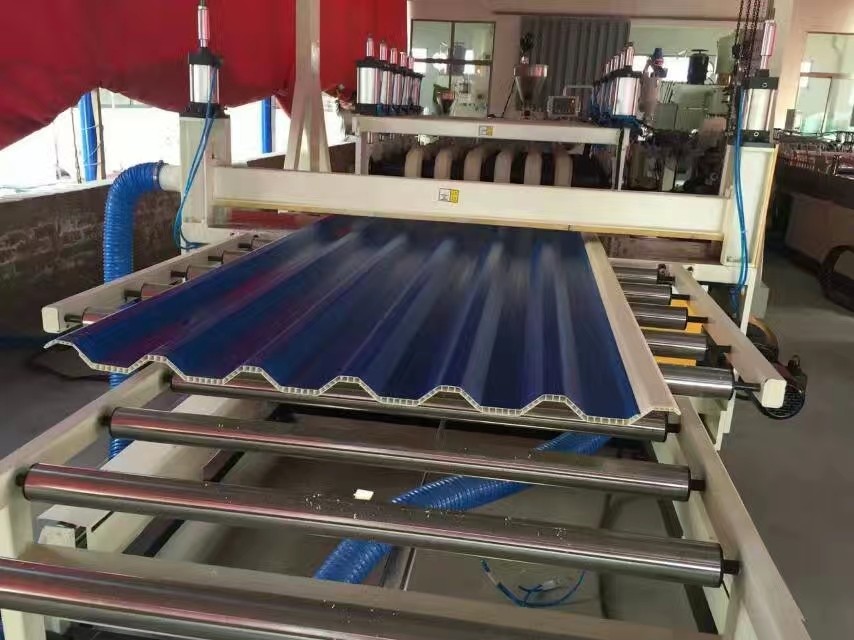
(6) When traction begins, the mold and mold head should have a certain distance to facilitate traction. Open the waterway(note that water must not be poured to the mold head, otherwise it will cause the mold head to produce abnormal material and cause the mold to be cut or blocked). The shape of the complex cavity is small and the shape of the multi-cavity profile needs to be shaped. Open the cover plate of the mold; After confirming the normal plasticization of the extruded material, the material is brought to the traction machine through a set of traction ropes. Shorten the distance between the molding table and the die head, cover the cover plate, and start the vacuum pump. When the extrusion speed and traction speed are basically balanced, observe the profile to the normal extrusion and then shrink the distance between the molding table and the die head to the ideal value.
(7) If it is found that the billet is not formed at the entrance of the shaped mold or that the inner tendon adheres to the inner cavity surface of the profile, a pointed tool can be used to poke several small holes in the unformed part or the inner tendon part of the first shaped mold entrance., so that the small cavity body and the atmosphere through, The type of blank is open when entering the mold, which facilitates the formation of negative pressure and urges the blank to adhere tightly to the mold wall of the mold.
(8) In case of blockage(not blocked), the stereotyped platform should be moved back or the traction speed should be increased immediately, or the above two schemes should be implemented at the same time, and then the normal production should be restored through process adjustment. If it is blocked and the above plan is invalid, the stereotyped platform should be moved back immediately, and the material should be cut off along the stereotyped mold, the water vapor of the stereotyped mold should be closed, the traction speed should be reduced, and the profile should be slowly pulled out of the stereotyped mold. If part of the material is broken in the mold, the mold must be opened and the residue must be completely removed.
(9) When stopping, it is generally necessary to add the stop material to drain out the production material in the machine, and then stop the machine and remove the die head while hot.
Maintain of extrusion mold:
1, during the maintenance and cleaning process loading and unloading or cleaning improper, is one of the main causes of damage to the mold. Therefore, the removal and cleaning of the mold should be done by professionals.
2, the die head should be used in the removal and cleaning of copper devices.
3, the mold head joint surface(close cover) can be cleaned with fine oil stone or gold sand paper.
4, before the die has assembly, the runner should be polished to a low roughness with gold phase sand paper, and coated with a thin layer of organosilicon, in order to reduce gas and water corrosion during long-term storage to protect the runner.
During assembly, all bolts, screw bearing surfaces and threads must be coated with high temperature grease(7020).
6, when the model is dismantled, care should be taken to avoid collisions; When installing, install according to the order of the plates.
7, in the daily maintenance of the water tank should ensure that the shape of the block into the four sides of the proper adjustment space.
Storage of extrusion mold:
1, the mold should be stored in a dry, clean and ventilated warehouse, and it is forbidden to store with corrosion products;
2, after the mold is used, it must be cleaned and reassembled. After the oil seal, store it in the warehouse;
3, the mold should be stored on the special mold storage shelf to ensure the safe and easy access.
